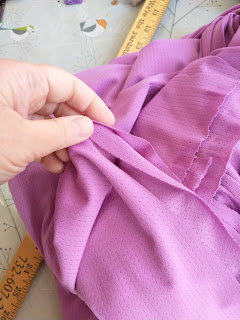
I had some mid and base layers on my list. I ended up buying some merino and power wool, but I had already bought this orchid stretch pin dot athletic from Nick of Time and I wanted to make one from it first since it isn't as precious.
I do like the contrast look with the Pacific Pullover so I paired this with a soft perforated knit from FabricMart. (It's really nice, I'm not sure why I only got 2 yards).
The pattern has options for very basic thumb cuffs, but I wanted something more like this from Oiselle:
Enter the free fingerless glove pattern from Patterns for Pirates. I like how they cover more of the hand. They go well up the wrist, too, but I wasn't sure how much to shorten, or how to align them until I tried both pieces on.
I cut the sleeves at the cuff cut line. I constructed the shirt up to the point of putting on the cuffs. I constructed the glove and I tried them on together. I marked how much to shorten the glove (about 1 3/8" for me) and I marked the alignment. When I pulled both pieces back off, I noticed the alignment was super close to aligning 2 seams of the glove with the color blocking and underarm seam of the sleeve.I tried it back on to see if that would work - and I think so! And look better than being slightly off even if there's a little twist. I also identified where it would make sense to have the watch window.
I sewed the cuff on, leaving the space between two glove seams on the top of my wrist open. I then tucked that back all the way around and carefully coverstitch hemmed that by about 3/8".
I think it worked pretty well.
Notes on the Pacific Pullover construction:
- I think the neck hole and collar are bigger around than they should be for my neck. Next time I will try to size the neck hole down
- The collar is meant to stretch to go around the neck, but it looks sloppy when it's completely not interfaced. I interfaced with some soft stretch interfacing but I had a really hard time making it reach, even clipping into the seam allowance a bit. Next time I will add just a half inch to the length of the collar.
- It's kind of messy how it's finished. I finished using the method from the Sundance. I did a guide stitch 3/8" from the edge of the inner collar piece. I then hand basted it up all the way across. After the zipper was done, I basted that down and then stitched in the ditch from the outside. It's really smooth.
- I wanted to bind the zipper and I used the new thick spandex binding I got from Porcelynne, but it's really too thick for this purpose. Next time some self fabric or FOE. Also I'll avoid covering the bottom of the zipper since the binding can serve the purpose
- Read through all the instructions before sewing - they jump around a bit and it's confusing. Her more recent patterns are easier to follow.
I love it and I'll make the same thing in merino (need to buy more zippers first!)
#WinterRunningGear #WinterRunningWardrobe #WinterRunningSewing


Comments
Post a Comment